Showing posts with label recipe. Show all posts

Saturday, September 3, 2011

New Recipe: Cheddar Chive Bacon Biscuits

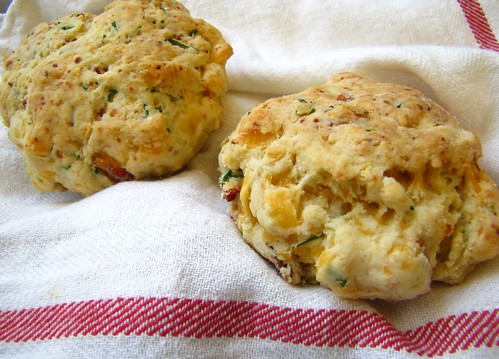
Cheddar Chive Bacon Biscuits

This week we did another one of our tiny potlucks at work and rather than lunch like we usually do we decided to do breakfast.  So I made the Cheddar Chive Bacon biscuits and they turned out quite yummy!  I got the recipe off of epicurious.com and it says it appeared in Bon Appetit in February 2010.


Cheddar, Bacon, and Fresh Chive Biscuits

Yield: 12
Active Time: 25 Minutes
Total Time: 55 minutes

Ingredients:
6 Thick cut bacon slices
3 3/4 cups flour
1 1/2 tablespoons baking powder
1 1/2 teaspoons baking soda
1 1/4 teaspoons salt
1/2 cup (1 stick) chilled unsalted butter cut into 1/2 inch cubes
2 1/2 cups coarsely grated sharp cheddar (about 12 ounces)
1/3 cup chopped fresh chives
1 3/4 cup buttermilk


Preheat oven to 425 degrees.  Line a heavy baking sheet with parchment paper.  cook bacon in a heavy large skillet over medium heat until crisp and brown.  transfer bacon to paper towels to drain, then chop coarsely.


Combine flour, baking powder, baking soda, and salt.  Add butter cubes and mix in with a pastry cutter until a coarse meal forms.  Add cheddar cheese, fresh chives and chopped bacon - toss to blend.  Gradually add buttermilk, stirring to moisten evenly.  Batter will feel sticky.


Using lightly floured hands, drop generous 1/2 cup batter for each biscuit onto prepared baking sheet, spacing batter mounds about 2 inches apart.  


Bake biscuits until golden and tester inserted in the middle comes out clean, about 18-20 minutes.   Let cool 10 minutes and serve biscuits warm or at room temperature.

Monday, August 1, 2011

A New Recipe Each Week

Prosciutto Gruyere and Shallot Pizza

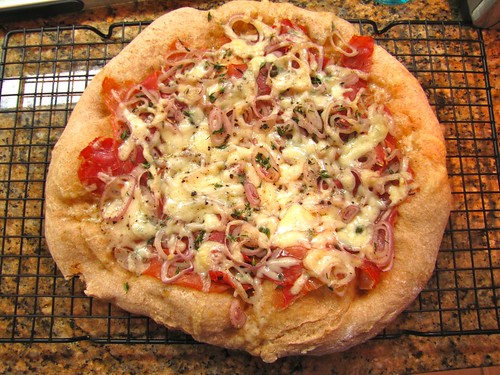
So a couple weeks ago I decided that after a slight tapering off of my cooking that I wanted to start making more yummy home cooked meals and decided that I would try at least one new recipe a week. Last week we had a super good chicken club sandwich with an olive tapenade and today we tried another delicious and successful meal. Now anyone who knows me knows I'm not much for pork - it's a mental thing I think, something I haven't "liked" for a very long time. But I've been easing up a bit lately when it comes to prosciutto. Especially when the prosciutto is cooked or crisped. There comes in our recipe for today - Ham, Gruyere and Shallot pizza. Now because I don't eat ham we replaced with prosciutto and it was a good result.

As you can see from the photo above, it looks delicious and tastes just as good as it looks. So here's to two weeks with two successful recipes! Maybe you'll give this a try and enjoy it as much as we did.

On another note, it's getting us very excited for our upcoming visit to Paris and Provence later this year!!!


Ham, Gruyere and Shallot Pizza
Real Simple, October 2009

Ingredients
cornmeal for the pan (optional, we did not use this)
1 pound pizza dough, thawed if frozen
2 tablespoons olive oil
2 shallots, cut into thin rings and separated
12 sprigs fresh thyme
kosher salt and black pepper
1/2 pound thinly sliced deli ham (I don't like regular ham, so we used prosciutto instead)
1/2 cup grated Gruyere or Swiss cheese (2 ounces)


Directions
  • Heat oven to 425º F. Sprinkle a rimmed baking sheet with the cornmeal. Shape the dough into a 14-inch circle and place on the prepared baking sheet.
  • Brush the dough with 1 tablespoon of the oil and bake until puffed and golden, 15 to 20 minutes.
  • Meanwhile, in a medium bowl, toss the shallots, thyme, the remaining tablespoon of oil, and 1/4 teaspoon each salt and pepper.
  • Top the partially cooked dough with the ham, shallot mixture, and cheese. Bake until the crust is crisp and the cheese has melted, 12 to 15 minutes.

Thursday, October 14, 2010

Feels like Fall

Fifth Avenue Skyline
Skyline over Fifth Avenue

I was walking home from work today and felt for the first time this season that it was really autumn. It was raining fairly hard, and there were yellow leaves starting to dot the ground beneath the trees.

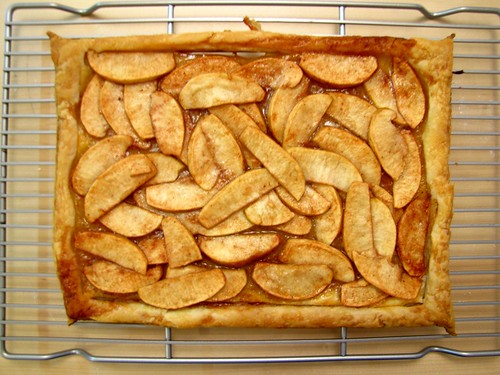
When I got home (my spanish lesson was moved to Saturday) I decided to make an apple tart for work tomorrow. Sometimes when both my boss and my manager are our of town, my coworkers and I have lunch together, each person brings something to share with the others (in the past I've brought tortilla, artichoke bean bruschetta, and so on). I was a bit stumped about what to make, but hey - why not make an apple tart, it fits perfectly with the cooler autumn air!

Apple Tart

Rustic Apple Tart

Ingredients

* Flour, for work surface
* 1 sheet (from a standard 17.3-ounce package) frozen puff pastry, thawed
* 3 Granny Smith apples (I used golden delicious)
* 1/3 cup granulated sugar
* 1 large egg yolk, beaten with
* 1 teaspoon water, for egg wash
* 2 tablespoons unsalted butter

Directions

1. Preheat oven to 375 degrees. On a lightly floured work surface, roll out pastry sheet (still folded) to an 8-by-14-inch rectangle.Trim edges with a sharp paring knife. Transfer to a baking sheet; place in freezer. Peel, core, and slice apples 1/4 inch thick. Toss in a large bowl with sugar (I also added 1/2 tsp Cinnamon and 1/4 tsp nutmeg to the sugar).

2. Brush pastry with egg wash, avoiding edges. Use a sharp paring knife to score a 3/4-inch border around pastry (do not cut all the way through). Place apples inside border, and dot with butter. Bake until pastry is golden and apples are tender, 30 to 35 minutes.


Sunday, October 10, 2010

Fall Food - A Share from Friends

Vegetables

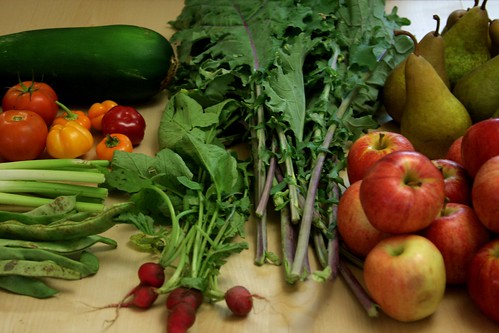
We were recently lucky to "inherit" a CSA share from our friends Josh and Virginia who were going on a fantastic trip to Peru. They needed someone to pick up their share of fresh fruits and vegetables for the week. Felipe stopped by and picked up a bounty of veggies and a peck of fruit. Here's what we got (I'm sorry...without exact measurements):

1 Bunch Kale
1 Large Zucchini
1 Fennel Bulb
A handful of green beans (not sure what variety)
4 small tomatoes
5 small peppers
4 small radishes
1/2 peck of Bosc Pears
1/2 peck of Gala Apples

So the first thing I wanted to use was the Kale, as it was large and leafy...and prone to wilting if left too long! In all honesty, I've never used or eaten Kale in anything, so my first major task was find out what I could do with it. Unfortunately my bevy of cookbooks weren't much help - hardly any of them had recipes using kale. Even when I checked my How to Cook Everything Vegetarian by Mark Bittman, no luck. A friend of mine at work gave me what looked to be a delicious recipe for soup using kale and a bunch of other yummy ingredients. The benefit of this recipe is that I already had everything on hand to make it (who doesn't love that!?).

Kale Soup
Sorry...soup doesn't photo well (at least for me!)

Kale, White Bean, and Potato Soup

Serves 4
Prep Time: 15 Minutes
Cook Time 25 Minutes

Ingredients
1 Tablespoon Olive Oil
1 Medium Red Onion, thinly sliced (I used shallot instead)
1 clove Garlic, chopped
4 cups vegetable broth
1 teaspoon sherry vinegar
1/2 teaspoon salt
1/4 teaspoon red pepper flakes
1 cup canned white beans, rinsed and drained
1 cup diced carrots
2 cups all purpose potatoes, peeled and diced
2 cups Kale, tough stems removed, cut into thin ribbons
4 lemon wedges

Heat olive oil in a large saucepan and saute the onion/shallot and garlic for 5 minutes, or until translucent.

Add vegetable broth, vinegar, salt, and red pepper flakes. Bring the mixture to a boil and add the white beans, carrots, potatoes and kale.

Return to a boil, then reduce to medium heat. Cook for 15 minutes, or until vegetables are tender.

Ladle into individual soup bowls. Squeeze juice from lemon wedges into each.


The soup was delicious, and entirely vegetarian friendly. The potatoes, canellini beans and carrots were filling, and the shallot and lemon gives it a nice flavor. I also really enjoyed the hint of heat from the red pepper flakes. I think that this soup will replace my chicken noodle soup when I get sick - it's packed full of vitamin C which we all know is good for our immune systems, and the heat from the red pepper flakes is good for opening up a congested head. Something to keep in mind with the chilly and rainy autumn weather we have upon us.

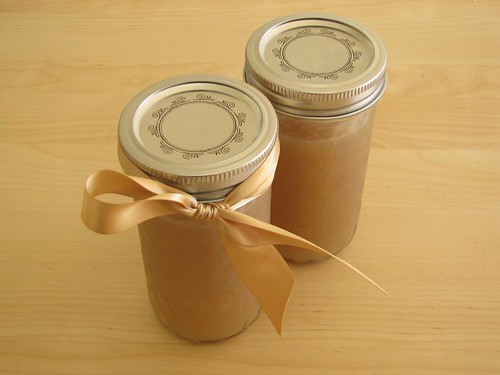
Next, what possibly could we do with all this fruit!? I know they say an apple a day keeps the doctor away, but that's a lot of apples for two people to eat. and the pears as well. So again I went to my cookbooks to see what I could find (as I've never been good at creating recipes from scratch). I found a great recipe for a Pear Butter from Martha Stewart.

Pear Butter

Pear Butter

Ingredients
Makes about 2 cups

* 12 Bosc pears, very ripe, cored, peeled, and cut into large chunks
* 3/4 cup sugar
* 1 vanilla bean
* 3 strips lemon rind, about 2 inches in length

Directions

1. Place all ingredients and 1/4 cup water in a heavy-bottomed pan. Cook over a low flame 2 to 3 hours, until the fruit is soft.

2. Remove the vanilla bean, and put the fruit through a food mill on the smallest setting. Pour into canning jars, filling them within a half inch of top. Tap filled jars on table, and run a knife around sides to remove air bubbles. Make sure the top of the jar is clean; seal.

3. Refrigerate immediately. The butter will keep for two to four weeks.


The pear butter turned out well, but had a less "buttery" texture. In the end it kind of has more of a sauce texture. Felipe has decided it goes perfectly on waffles and pancakes.


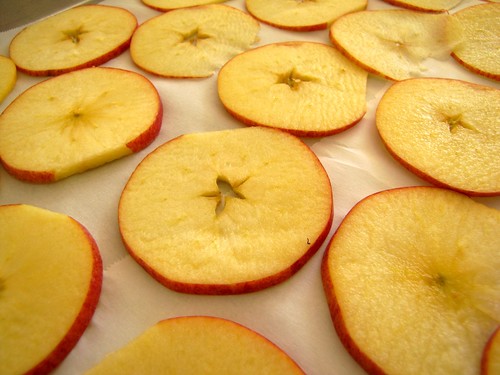
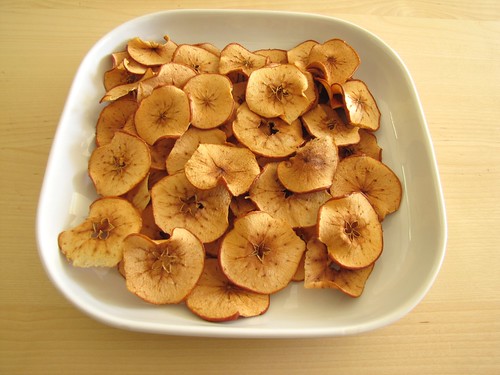
As for the apples, I was decidedly less adventurous, and just sliced them up to make apple chips. This was super simple and went like this: slice the apples, with skin on and without removing the core (leaves a nice star pattern on the apples). As you slice, place slices in a bowl of water with a touch of lemon juice to prevent browning. When all apples are sliced, line two baking sheets with parchment paper and place on layer of apple slices on the cookie sheets. Bake in a 225 degree oven for 2 to 2 1/2 hours.

Apple Slices

Apple Chips
MMmmmmmm....yum! Let's just say that these apple chips did not last long on this plate....

Thanks to Josh and Virginia for sharing their CSA share with us, we really enjoyed it!

Sunday, July 18, 2010

Birthday "Fiesta"

Fiesta comida

Last night Felipe and I hosted a birthday "fiesta" (my birthday was last Monday - thanks to everyone for the well wishes!), and had a blast with our friends.

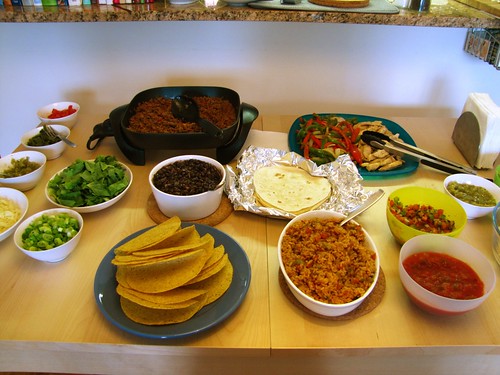
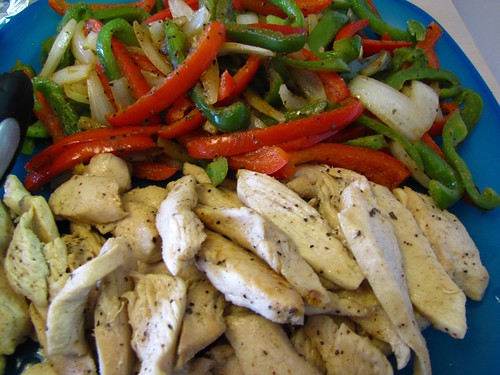
So I basically spent all day cooking and prepping the food, which was tiring but fun, and got to try out a few new recipes. Above you can see the table, all set and ready to dig in - except for some Carne Asada which was being prepared on our "grill". We had ground beef taco, chicken fajita, carne asada, black beans, Spanish rice, guacamole, a terrific and spicy tomatillo sauce that felipe made, and all the other typical taco fixings.

Chicken fajitas
Chicken Fajitas

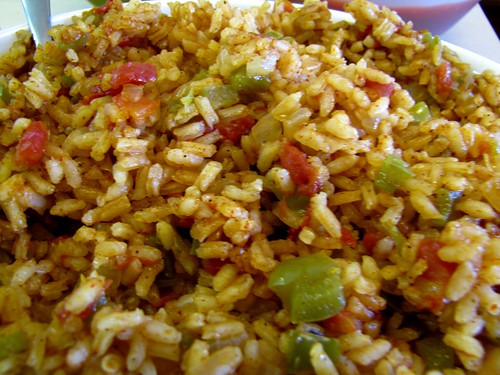
Spanish Rice
The Spanish rice - super yummy!

I got the recipe for the Spanish rice from Allrecipes.com, and it turned out super well.

Spanish Rice


Ingredients

* 2 tablespoons vegetable oil
* 1 cup uncooked white rice
* 1 onion, chopped
* 1/2 green bell pepper, chopped
* 2 cups water
* 1 (10 ounce) can diced tomatoes and green chiles
* 2 teaspoons chili powder, or to taste (I used 1 tablespoon and it came out well)
* 1 teaspoon salt

Directions

1. Heat oil in a deep skillet over medium heat. Saute rice, onion, and bell pepper until rice is browned and onions are tender.

2. Stir in water and tomatoes. Season with chili powder and salt. Cover, and simmer for 30 minutes, or until rice is cooked and liquid is absorbed.


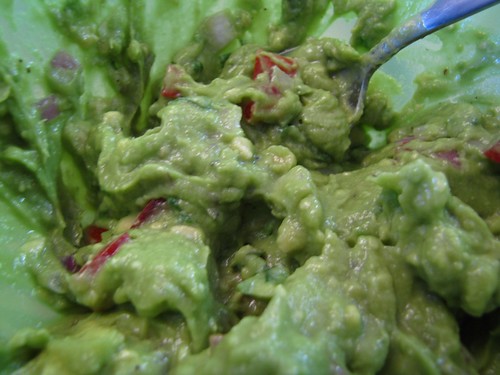
Guacamole
The guacamole - also yum!

I got the recipe for the guacamole from Simply Recipes. Super easy to make, and delicious.

Guacamole


Ingredients

* 2 ripe avocados
* 1/2 red onion, minced (about 1/2 cup)
* 1-2 serrano chiles, stems and seeds removed, minced
* 2 tablespoons cilantro leaves, finely chopped
* 1 tablespoon of fresh lime or lemon juice
* 1/2 teaspoon coarse salt
* A dash of freshly grated black pepper
* 1/2 ripe tomato, seeds and pulp removed, chopped

Garnish with red radishes or jicama. Serve with tortilla chips.
Method

1 Cut avocados in half. Remove seed. Scoop out avacado from the peel, put in a mixing bowl. (See How to Cut and Peel an Avocado.)

2 Using a fork, mash the avocado. Add the chopped onion, cilantro, lime or lemon, salt and pepper and mash some more. Chili peppers vary individually in their hotness. So, start with a half of one chili pepper and add to the guacamole to your desired degree of hotness. Be careful handling the peppers; wash your hands thoroughly after handling and do not touch your eyes or the area near your eyes with your hands for several hours.

Keep the tomatoes separate until ready to serve.

Remember that much of this is done to taste because of the variability in the fresh ingredients. Start with this recipe and adjust to your taste.

3 Cover with plastic wrap directly on the surface of the guacamole to prevent oxidation from the air reaching it. Refrigerate until ready.

4 Just before serving, add the chopped tomato to the guacamole and mix.

Serves 2-4.


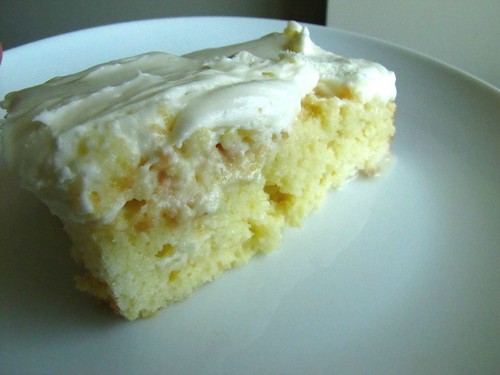
tres leche
Tres Leche cake

I made a tres leche cake, recipe from Alton Brown, and everyone devoured it! It was super yummy (the pound of sugar doesn't hurt), but also very heavy!

Tres Leche Cake

Ingredients
For the cake:

* Vegetable oil
* 6 3/4 ounces cake flour, plus extra for pan
* 1 teaspoon baking powder
* 1/2 teaspoon kosher salt
* 4 ounces unsalted butter, room temperature
* 8 ounces sugar
* 5 whole eggs
* 1 1/2 teaspoons vanilla extract

For the glaze:

* 1 (12-ounce) can evaporated milk
* 1 (14-ounce) can sweetened condensed milk
* 1 cup half-and-half

For the topping:

* 2 cups heavy cream
* 8 ounces sugar
* 1 teaspoon vanilla extract

For the cake:
Directions

Preheat the oven to 350 degrees F. Lightly oil and flour a 13 by 9-inch metal pan and set aside.

Whisk together the cake flour, baking powder and salt in a medium mixing bowl and set aside.

Place the butter into the bowl of a stand mixer. Using the paddle attachment, beat on medium speed until fluffy, approximately 1 minute. Decrease the speed to low and with the mixer still running, gradually add the sugar over 1 minute. Stop to scrape down the sides of the bowl, if necessary. Add the eggs, 1 at a time, and mix to thoroughly combine. Add the vanilla extract and mix to combine. Add the flour mixture to the batter in 3 batches and mix just until combined. Transfer the batter to the prepared pan and spread evenly. This will appear to be a very small amount of batter. Bake on the middle rack of the oven for 20 to 25 minutes or until the cake is lightly golden and reaches an internal temperature of 200 degrees F.

Remove the cake pan to a cooling rack and allow to cool for 30 minutes. Poke the top of the cake all over with a skewer or fork. Allow the cake to cool completely and then prepare the glaze.

For the glaze:

Whisk together the evaporated milk, sweetened condensed milk and the half-and-half in a 1-quart measuring cup. Once combined, pour the glaze over the cake. Refrigerate the cake overnight.

Topping:

Place the heavy cream, sugar and vanilla into the bowl of a stand mixer. Using the whisk attachment, whisk together on low until stiff peaks are formed. Change to medium speed and whisk until thick. Spread the topping over the cake and allow to chill in the refrigerator until ready to serve.


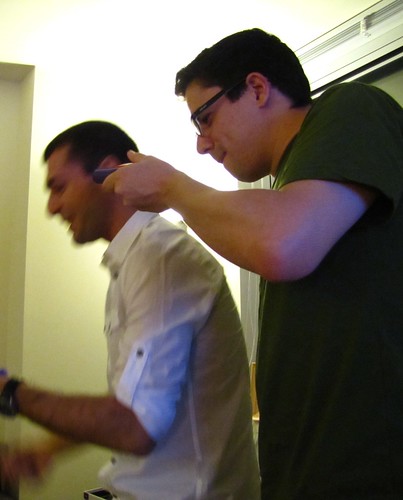
After stuffing ourselves, we played a couple of games. Oh how I've missed game nights! We did both Taboo and Apples to Apples - we had to keep it to games that the 10-12 of us could play together. Taboo took a little getting used to - agreeing on or understanding all the rules and such. Felipe was super on top of controlling the buzzer!

Taboo 1

Taboo 2

Group

Thanks everyone for coming over and having some food and fun. I had a terrific birthday!

Sunday, April 4, 2010

Italian Cooking....Mmmmmm

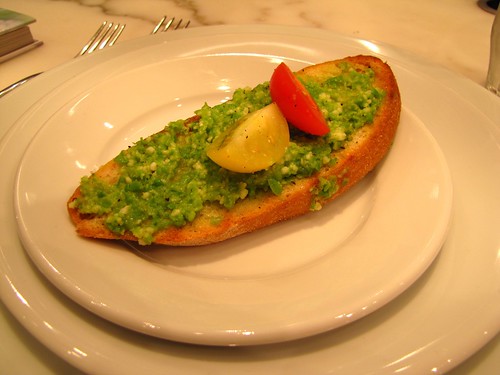
Pea Pesto Crostini
Pea Pesto Crostini

Last Wednesday I took another demonstration cooking class at William's Sonoma. It was another class out of their "Cookbook" series - where they demonstrate recipes from cookbooks - you get to see how it's done, eat all the fantastic food, and get to take home the cook book. This time we learned a few super yummy recipes out of Giada DeLaurentiis's new cook book Giada at Home.

The first recipe was for the Pea Pesto Crostini (as pictured above). It was so simple to make and was super delicious and refreshing. I made this at home on Friday night and it turned out just as well as when they had made it at the store.

Pea Pesto Crostini
(recipe by Giada De Laurentiis of course)

1 (10 oz) package of frozen peas, thawed
1 garlic clove
1/2 cup freshly grated parmesan cheese
1 teaspoon salt, plus more to taste
1/4 teaspoon freshly grown black pepper, plus more to taste
2/3 cup olive oil
8 (1/2 inch thick) slices of baguette or ciabatta bread
Cherry tomatoes, halved, or 1 small tomato diced

Pulse together in a food processor the peas, garlic, parmesan cheese, salt and pepper. With the machine running, slowly add 1/3 cup of the olive oil and continue to mix until well combined, 1 to 2 minutes. Season with more salt and pepper if needed. Transfer to a small bowl and set aside.

For the crostini: preheat a stovetop griddle or grill pan over medium high.

Brush both sides of each of the bread slices with the remaining 1/3 cup of olive oil and grill until golden, 1 to 2 minutes. Transfer the bread to a platter and spread 1 to 2 tablespoons pesto on each slice. Top each crostini with 2 tomato halves and serve.


I don't have a food processor - it's just too large an appliance to add to our collection that already takes up our tiny kitchen counter tops. I bought the other day a really fantastic "hand operated" food processor called the Veggie Chop. It's really fantastic, and is I am positive perfect for chopped cucumber and tomato salads or salsas. I made the pea pesto in this, as well as the next recipe (below) and it worked well...and gave me a bit of a work out too!

The Next recipe was for Artichoke and Bean Bruschetta
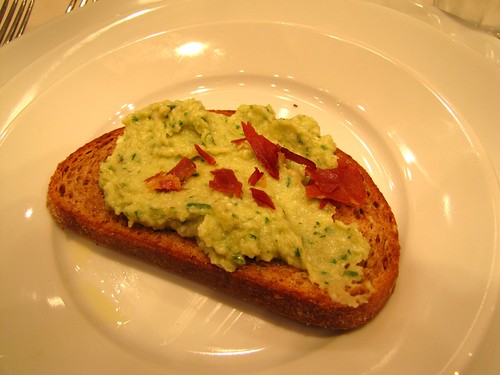
Artichoke and White Bean Bruschetta

This was also extremely delicious and flavorful. I could eat this just for dinner itself really. Of course - to keep it vegetarian you can leave the prosciutto off.

Artichoke and Bean Bruschetta

Vegetable oil cooking spray
4 very thin slices of prosciutto
12 (1/4" thick) slices rustic country bread
1/2 cup olive oil, plus more for drizzling
1 (12 oz) package frozen artichoke hearts, thawed
1 (15 oz) can cannelini beans, rinsed and drained
1 cup freshly grated Pecorino Romano Cheese
1/2 cup coarsely chopped fresh basil leaves
1 teaspoon grated lemon zest
1 tablespoon fresh lemon juice
2 teaspoons salt
1/2 teaspoon freshly ground black pepper

Place an over rack in the center of the oven and preheat the oven to 375 degrees. Spray a rimmed baking sheet with vegetable oil cooking spray

Lay the prosciutto in a single layer on the prepared baking sheet and bake for 10 to 12 minutes, until crispy. Set aside to cool for 10 minutes

on another baking sheet, arrange the bread slices in a single layer. Using a pastry brush, brush the bread with 1/4 cup of the oil. Bake for 12 to 15 minutes, until golden.

In a food processor, combine artichoke hearts, beans, cheese, basil, lemon zest, lemon juice, salt and pepper. Pulse until the mixture is chunky. With the machine running slowly, add the remaining 1/4 cup olive oil and mix until combined but still slightly chunky.

Spoon the artichoke mixture onto the crostini. Crumble the prosciutto and sprinkle on the top. Drizzle with olive oil and serve.


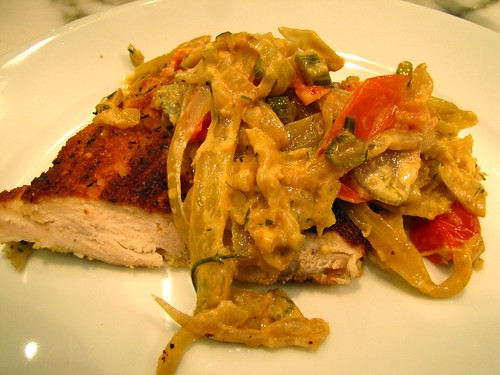
Then we had the main dish - Chicken Milanese with Fennel and Tomato Sauce
Chicken Milanese with Tomato and Fennel Sauce

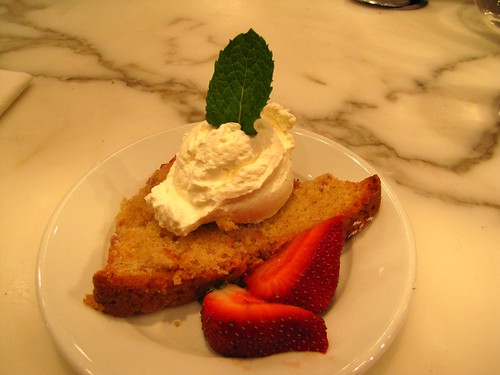
And for dessert - Raspberry Poundcake with Moscato Whipped Cream
Raspberry Poundcake with Moscato Whipped Cream

It was so delicious! I can't wait to make the chicken milanese and I am sure that felipe is really looking forward to trying the raspberry poundcake (he'll just have to wait for raspberries to be more in season).

Saturday, October 17, 2009

Recipe: Sarma

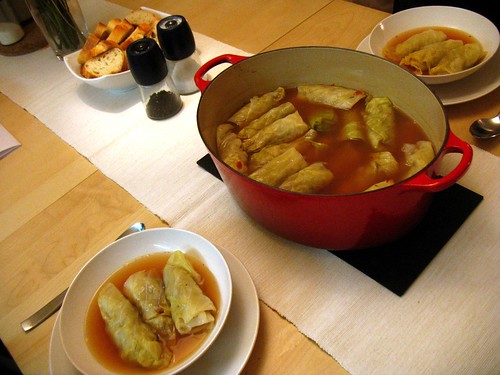
Sarma
Today I reached years back in my food memory and made for the first time every (by myself) the Sarma that I remember my mom making. I great up with a variety of Armenian recipes, and this one was always good for a cold winter night. Of course, we're not quite at winter just yet...but we're getting there!

I was a little nervous about making this - I've never made it, only watched my mom make it and that was even almost a decade since I've last had it! I used a recipe my mom sent me and it turned out quite well (Felipe even liked it!)...and I have lots of left overs for later. Yummy!

Sarma
(by the way - Sarma can vary in ingredients - sometimes using grape leaves instead of cabbage, and other indgredients for the fillings as well. It all depends on the region it's from)

Ingredients:
1.5 lbs ground beef
3/4 cup rice
1 medium yellow onion, chopped
salt and pepper to taste
1 tsp paprika
(Mix all of the above ingredients together thoroughly)

1 head of cabbage
2-3 cups of chicken broth
8 oz. tomato sauce
Juice of 1 lemon

De-core the cabbage head. Boil a large pot of water. When at a rolling boil, place the head of cabbage in the water and cook until softened (about 10 minutes). Remove the cabbage from the water, place in a colander for extra drainage.

Remove some of the tougher leaves and line the bottom of a casserole dish. With the remaining cabbage, remove one leaf at a time, use a knife to take out the thick part of the vein. Most of the time you can use a half leaf, depending on the size. Take a thumb sized portion of the meat mixture and roll it into the shape of a cigar. Place onto one end of the cabbage leaf and roll. Place the rolls in layers in the casserole dish. When all the meat mixture has been used, cover the rolls with the chicken broth, tomato sauce and lemon juice. Cook in the over at 350 degrees for one hour.

Serve the rolls in a bowl with the broth.

Sunday, July 19, 2009

Mmmmm....Dumplings

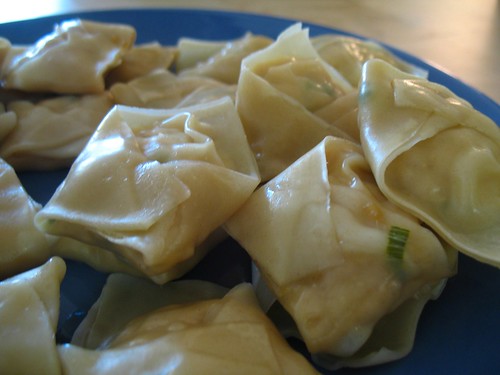
Dumplings - The finished product....
Yesterday I took a part of the late afternoon to make chicken dumplings....mmmm, man I love chicken dumplings. I can't say they are true to authentic dumplings (I always fold them like tortellini), but I certainly enjoy the taste of them, and can think of a few friends that enjoy them as well.

I made a double batch yesterday so that I would have some that I could freeze and use for dinner some night I am feeling lazy. Nicole and Sammi joined felipe and I for dinner later on, and you can bet that those dumplings were practically inhaled, and gone within fifteen minutes.

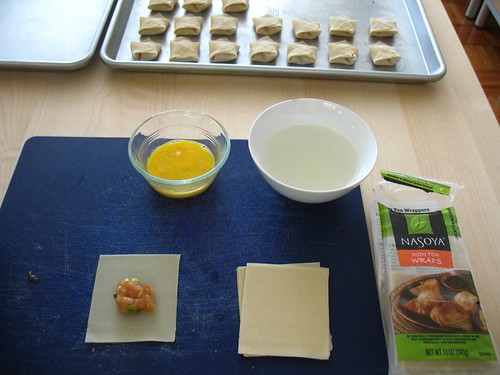
A photo of the preparations:
Dumplings - the making of....

Ingedients:
1 pound of ground chicken
3-4 scallions, chopped
1 eggs
Minced garlic to taste
Several dashes of soy sauce
1 packet of wonton wrappers (I use Nasoya)

Mix all ingredients together in a large bowl. Beat another egg and keep to the side. Take one wonton wrapper and place a quarter sized drop of the chicken mixture onto the center of the wrapper. Dip your finger into the egg wash and line two adjoining edges of the wrapper. Fold into a triangle and take the two corners farthest from each other and pinch them together in the shape of a tortellini. I use a rice cooker to steam the dumplings, but any steamer will do.

Enjoy!

Wednesday, June 17, 2009

Recipe: Curried Zucchini Soup

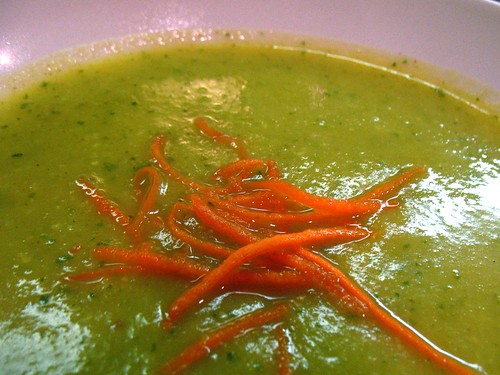
Curried Zucchini Soup
Tonight I tried a new recipe from the Everyday Food cookbook for Curried Zucchini soup, seemed like a good way to use the in-season zucchini. It turned out really well - very yummy and highly suggested! I think that there is a lot of room for improvisation with this recipe too. It's an easy recipe to make, and I look forward to trying it again....

Curried Zucchini Soup

1 Tablespoon Olive Oil
1 Medium Onion, Chopped
Coarse Salt
2 Garlic Cloves, minced
2 Teaspoons Curry Powder
1 1/2 lbs Zucchini (about 3), sliced 1 inch thick
1 Baking Potato, peeled and cut into 1-inch chunks
1/3 cup sliced almonds for garnish (optional)

1. Heat the oil in a large saucepan over medium heat. Add the onion and 1 tablespoon salt; cook, stirring occasionally, until the onion is soft, 4 to 5 minutes. Add the garlic and curry powder, cook, stirring constantly, until fragrant, about 1 minute.

2. Add the zucchini, potato, and 4 cups water. Bring to a boil; reduce the heat, and simmer until the vegetables are tender, 10-15 minutes.

3. In batches, puree the soup in a blender (do not fill more than halfway) until smooth; serve immediately, or let cool, and refrigerate in an airtight container until chilled. Garnish with toasted almonds (optional).


Eda - I think you might really like this, you should give it a try!

Thursday, April 9, 2009

Mmmmm.....Curry (there seems to be a food theme lately...)

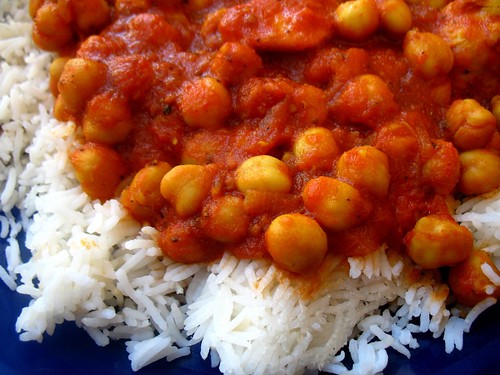
Curried Chickpeas

So it seems that many of my posts recently have been food related...I find this interesting, but cannot explain it! We've tried another new recipe recently, and it turned out quite well. I would maybe add a little less tomato sauce the next time I make it, and I added chicken to this recipe...but I highly recommend it as a quick and easy dinner. I can't remember where I picked up this recipe, but I think that it might have been one of my Food Magazines.

1 Cup long-grain white rice
2 tablespoons vegetable oil,
such as safflower
1 medium onion, minced
2 garlic cloves, finely chopped
coarse salt and ground pepper
1 tablespoon curry powder
1 teaspoon ground ginger
3 cups homemade or best quality store-bought tomato sauce
2 cans (15 ounces each) chickpeas, rinsed and drained
1 tablespoon fresh lime juice
½ cup plain low-fat yogurt

Cook rice according to package instructions; cover and keep warm

While rice is cooking, heat oil over medium in a large skillet. Add onion and garlic; season with salt and pepper. Cook stirring frequently, until onion is tender, 4 to 6 minutes. (this is where I added the chicken) Add curry powder and ginger; cook, stirring, until fragrant, about 1 minute.

Add tomato sauce, chickpeas, and 1 ½ cups water. Bring to a boil; reduce to a simmer, and cook, stirring occasionally, until thickened, about 8 to 10 minutes. Stir in lime juice; season with salt and pepper. Serve stew with rice and yogurt, garnished with lime wedges and a pinch of curry.

*I opted not to use the yogurt, and it was fine without it. Also, I would consider adding potato or carrot to the mix as well.

Monday, July 28, 2008

Trying something a little new...

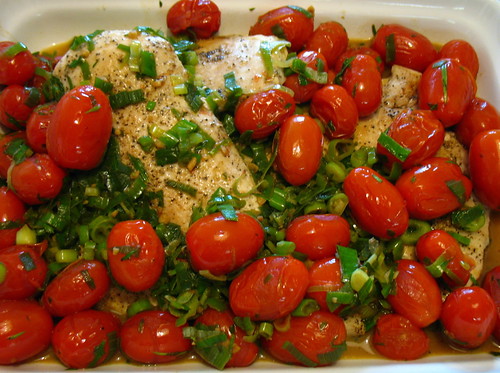
Chicken Cutlets with Tomato Saute

So for dinner tonight I was going to use our new pots and pans...we just got them yesterday and they make me drool just thinking about what can be cooked in them! However...I didn't use the new pots and pans, instead I used a new recipe. I did this with an old, large skillet because I wasn't sure how big of a recipe this would be.

I tend to find one thing I like and then stick with it. Why not? If it's good, you don't need to risk eating something mediocre. Or do you? This isn't my food motto by all means. I love to try all sorts of food. Sticking with what works mainly applies to what I cook. I'm not very good at inventing recipes, I'm much better at preparing food based on established recipes. And herein lies my trap.

Recently I started reading a book entitled "Secret Ingredients" which is a collection of stories, essays, poems, and cartoons from the New Yorker all about cooking, food and anything related to the culinary world. It's an amazing book full of delicious tales and it is inspiring (except for the chapter on tripe...you'll never ever see that near my mouth).

As a result of the inspiring read I was sitting on the couch surrounded by a variety of my cookbooks and magazines with recipes, looking for something that I could cook that might taste as good as what was written in the book. Felipe paged through one of my Real Simple magazines and mentioned that he thought one of the recipes looked nice. So with my new found intrigue for recipes we haven't tried and food in general, we gave it a go tonight. It was a success! Felipe enjoyed the food as much as he enjoyed the picture of it in the magazine, and I like the taste in addition to the ease of cooking it. Here's the recipe:

Chicken Cutlets with Tomato Saute
Real Simple August 2008 (p.154)
Time: 45 minutes | serves 4

1 ½ lbs small chicken cutlets (8-12)
Kosher Salt and Pepper
2 tablespoons olive oil
1 ½ pints grape or cherry tomatoes
½ cup dry white wine (Such as sauvignon blanc)
4 scallions, sliced
2 tablespoons fresh tarragon leaves, chopped

Season the chicken with ½ teaspoon salt and ¼ teaspoon pepper. Heat the oil in a large skillet over medium-high heat. Working in two batches, cook the chicken until browned and cooked through, 2-3 minutes per side; transfer to plates.

Add the tomatoes to the skillet and cook over medium-high heat, stirring occasionally, until they begin to burst, 2-3 minutes.

Add the wine and simmer until the liquid is reduced by half, 2 to 3 minutes. Stir in the scallions and tarragon and serve with the chicken.

Sunday, June 1, 2008

Sunday afternoon tabouleh...

Last weekend marked the official start of the summer. For us, this is picnic season. Central park has become one of my favorite places in the entire city of New York. We often pack up a blanket, games, some variety of food (meats, bread, salad, vegetables, fruits, olives, etc.) and whatever else will keep us occupied in the green grass of the Great Lawn.

The food that we bring is of a particular pleasure to me. Today I made some tabouleh, a recipe I had forgotten for some time, but that is so simple and is perfect for picnics.

Tabouleh

  • 1 1/2 cups Fine Bulghur Wheat
  • 1 Large Bunch of Parsley (minced fine)
  • 1 Bunch of Green Onions (mince fine)
  • 2-4 Tomatoes (chopped)
  • 2 teaspoons Dried Mint
  • 1/3 cup Extra Virgin Olive Oil
  • 1/3 cup Lemon Juice

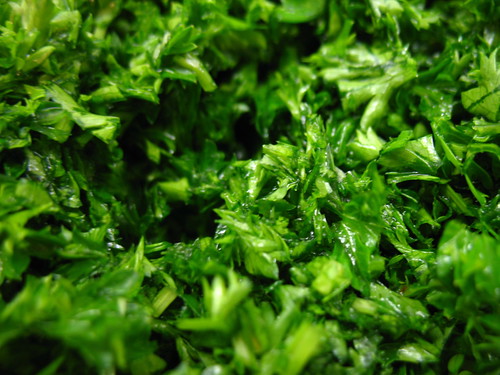
Parsley

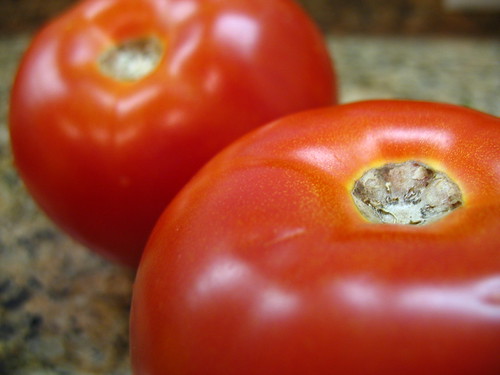
Tomato

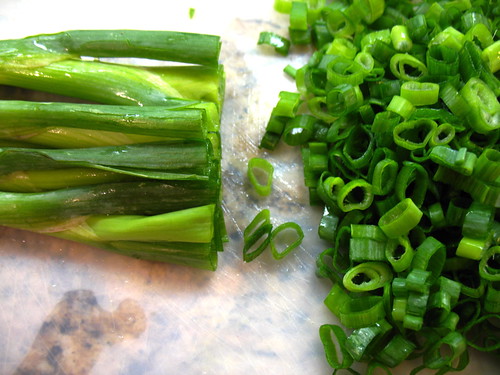
Green Onion

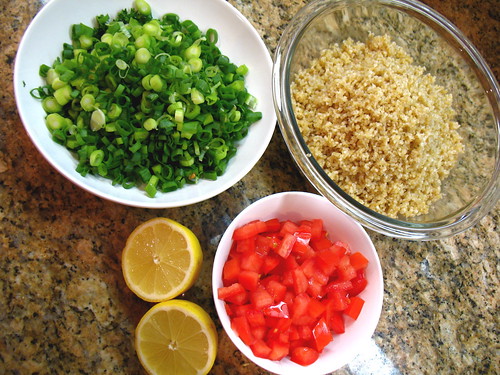
Tabouleh Ingredients

Soak the Bulghur for one hour in water, enough to cover, then squeeze our the water with your hands. Mix with all the other ingredients.

You can eat right away, however it is often better to let it sit for little while to take up the flavors....mmmmm yummmy!

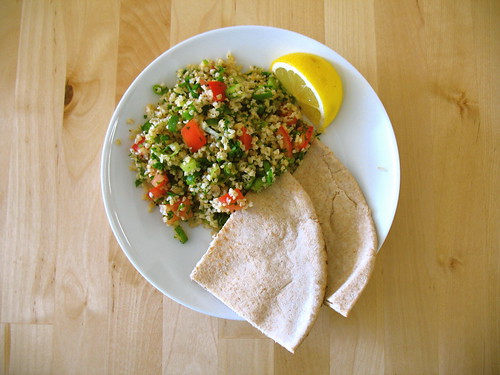
Finished Tabouleh